OpenSUSE Krypton Plasma 6 Setup
The last time I tried installing Plasma 6 in a VM with OpenSUSE Krypton, I failed to actually install Plasma 6 for development use. Recently I noticed a tip on the KDE Wiki and managed to get it working.
Install via LiveCD
Download OpenSUSE Krypton at:
https://download.opensuse.org/repositories/KDE:/Medias/images/iso/?P=*Krypton.*.iso
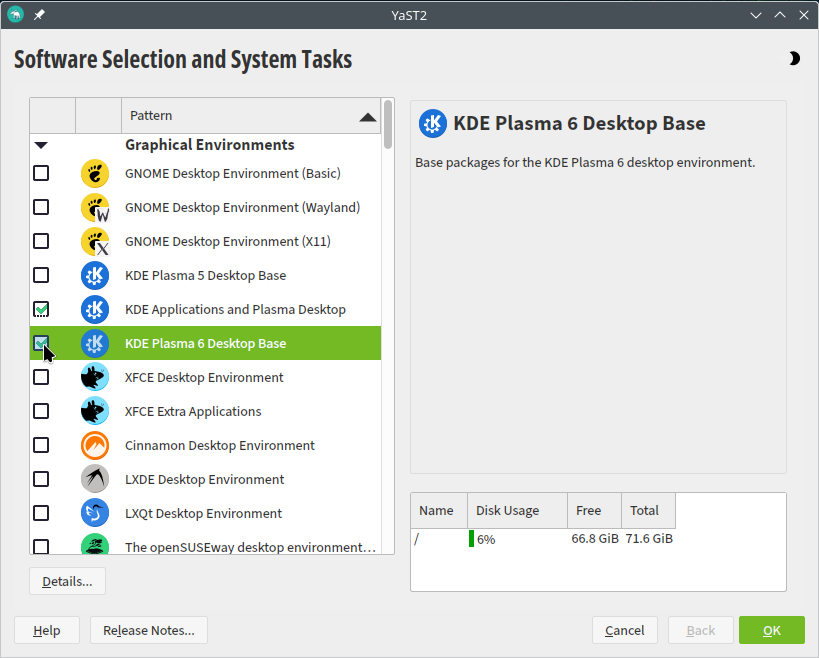
Even though the LiveCD runs Plasma 6, if you run the installation with the default setup it will install Plasma 5.
On the Plasma 6 wiki entry on community.kde.org, it mentions you need to change the installed Desktop Environment.
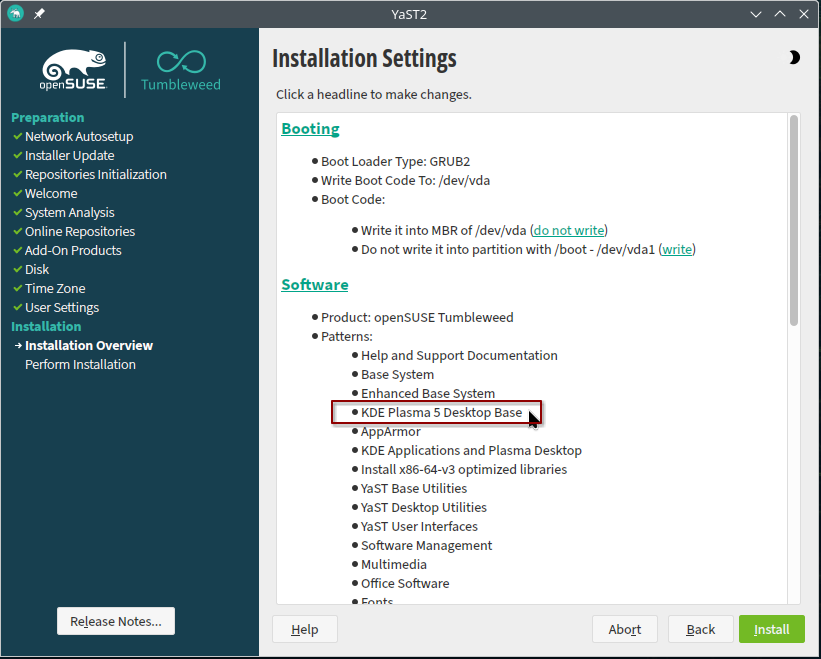
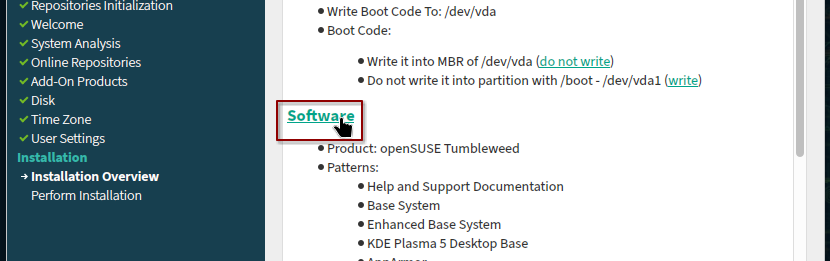
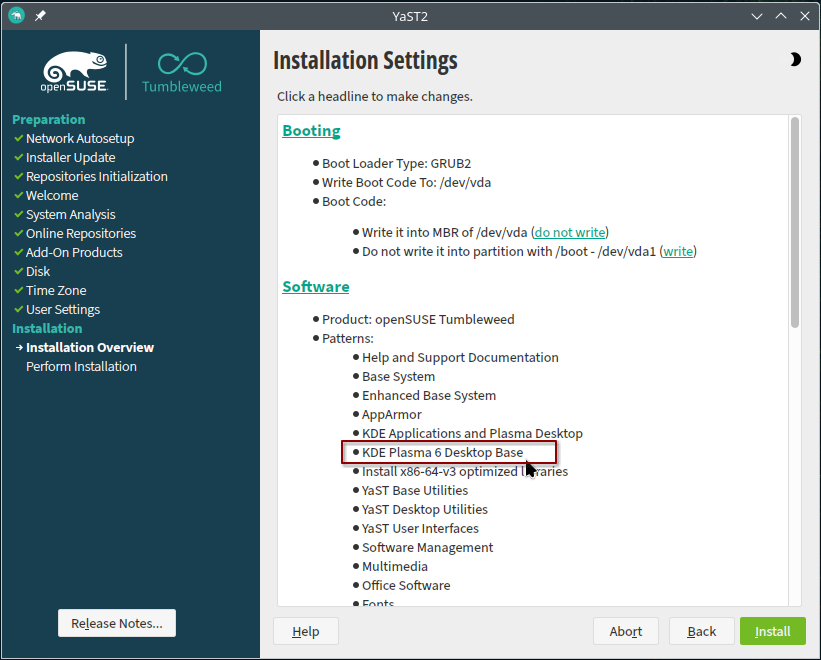
At the last step (installation summary), select “Software” and tick “KDE Plasma 6 Desktop Base”.
First Login
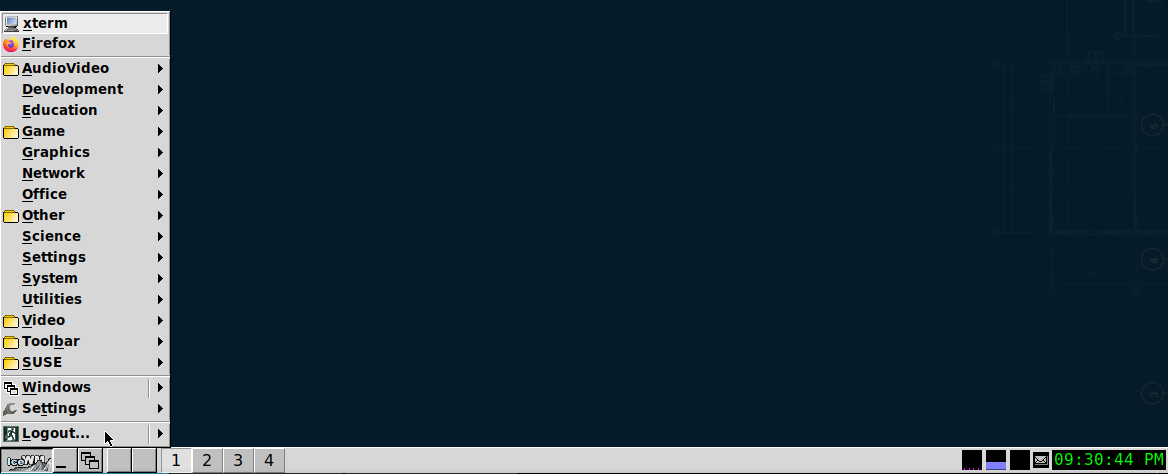
Another issue I found is that by default, the user will login to the “IceWM” Desktop Environment instead of “Plasma (Wayland)”.
So click the App Launcher button in the bottom-left of the IceWM panel, then click Logout.
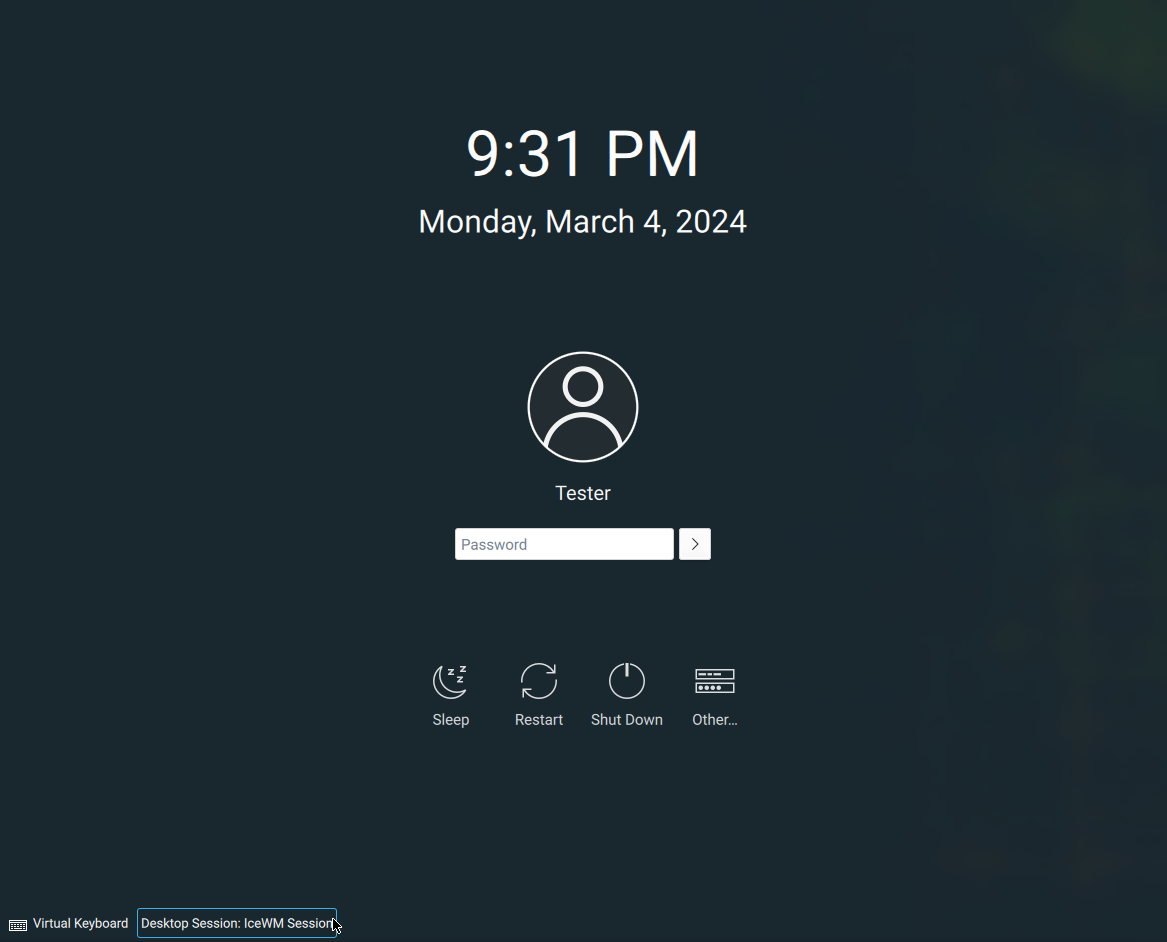
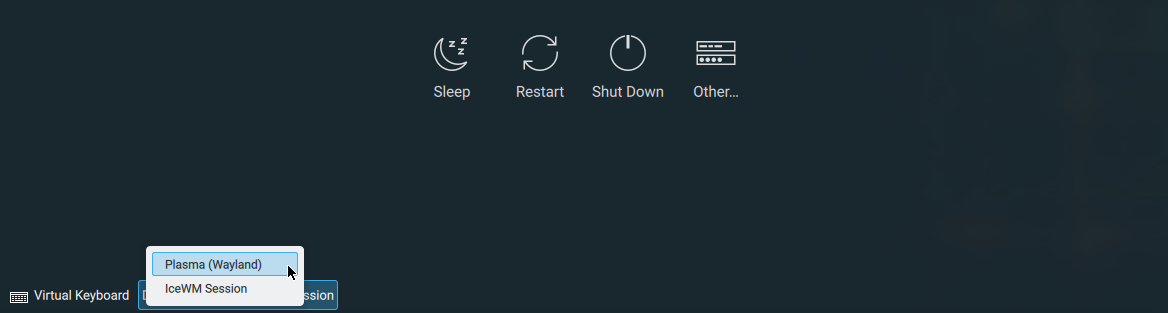
At the bottom-left of the SDDM Login Screen is a selector drop down to select the desktop environment you login to.
However if you have AutoLogin enabled then you will need to open up KDE’s System Settings.
Search for “Login Screen (SDDM)” under “Colors & Themes”.
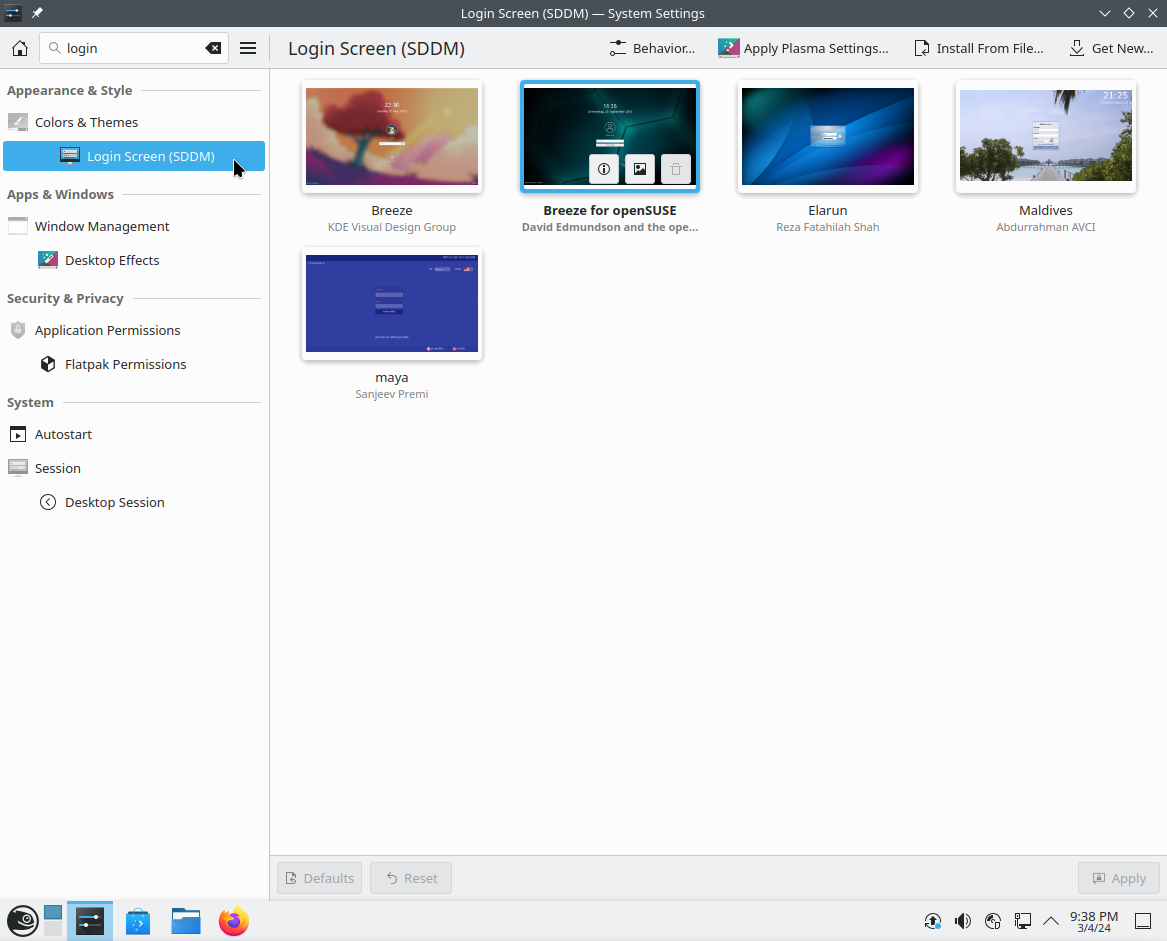
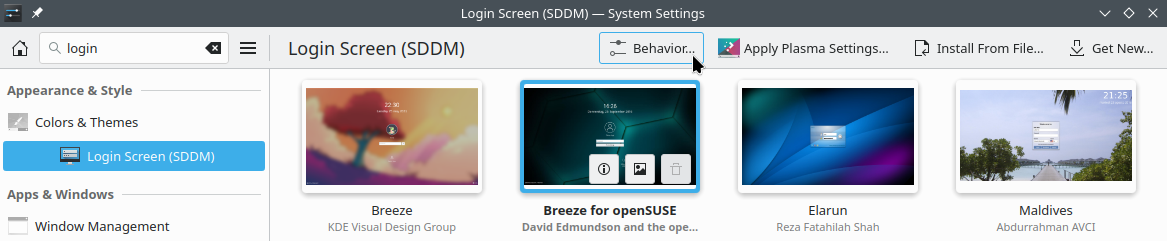
Click on the “Behavior” button.
Then change from (System Default) to Plasma (Wayland)
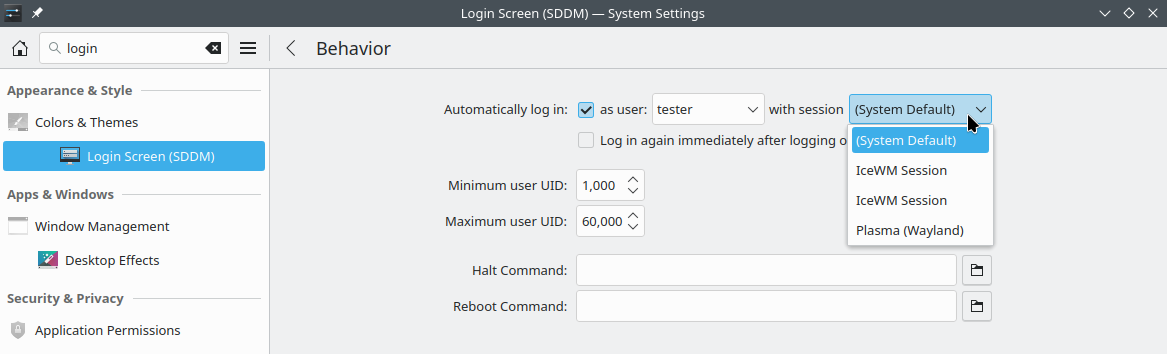
If you know how to change the system default please let me know.
Improving the VM Experience
Remove grub timeout
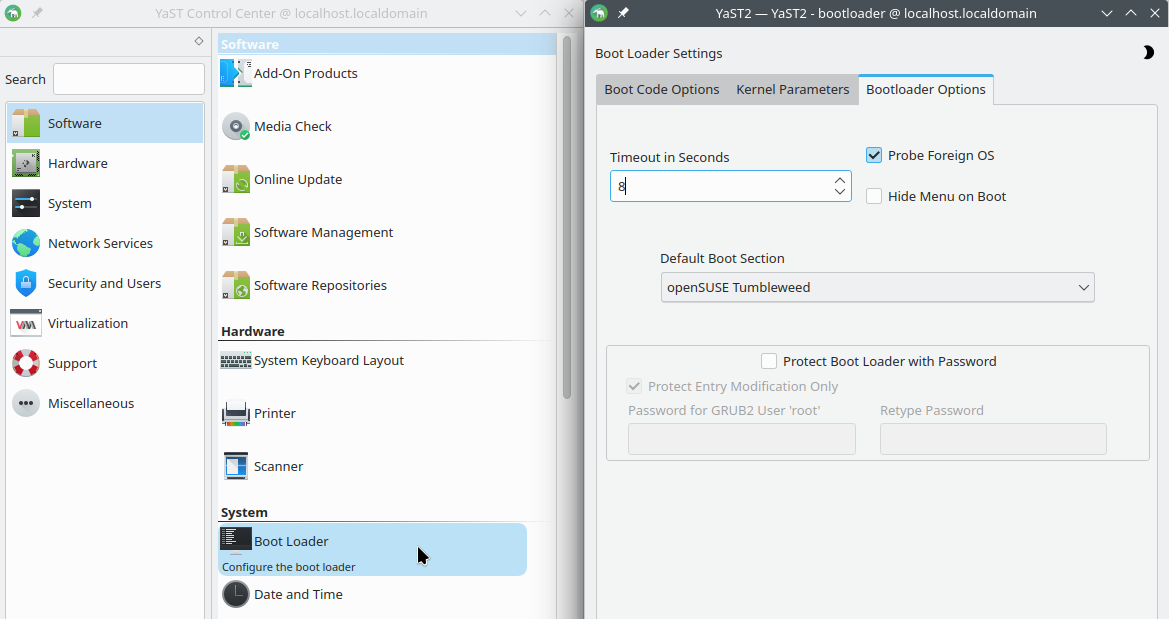
By default OpenSUSE will wait 8 seconds for you to select which boot drive you want.
- Search for “YaST” in the App Launcher
- Click “Boot Loader”
- Click the “Bootloader Options” tab
- Change “Timeout in Seconds” from
8to0
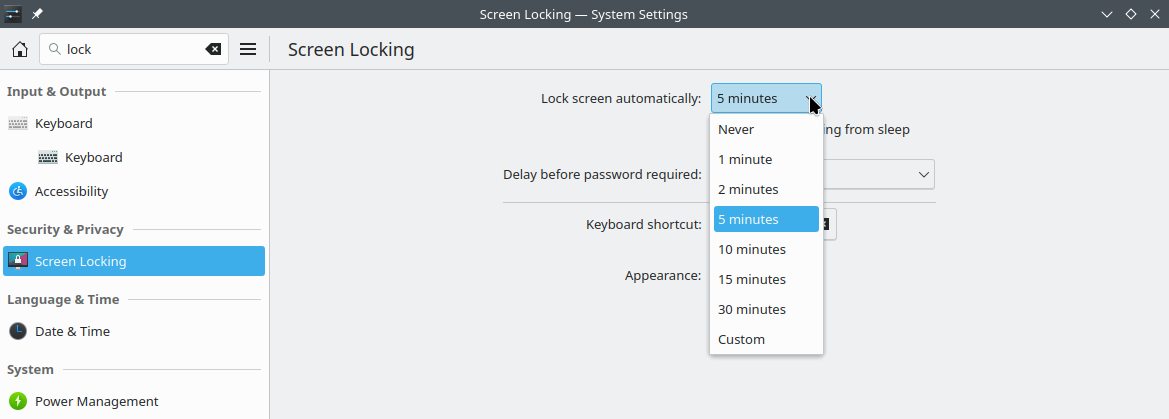
Disable the lock screen
First open up KDE’s “System Settings”.
Under “Screen Locking” change “Lock screen automatically” from 5 minutes to Never. Also uncheck “Lock after waking from sleep”.
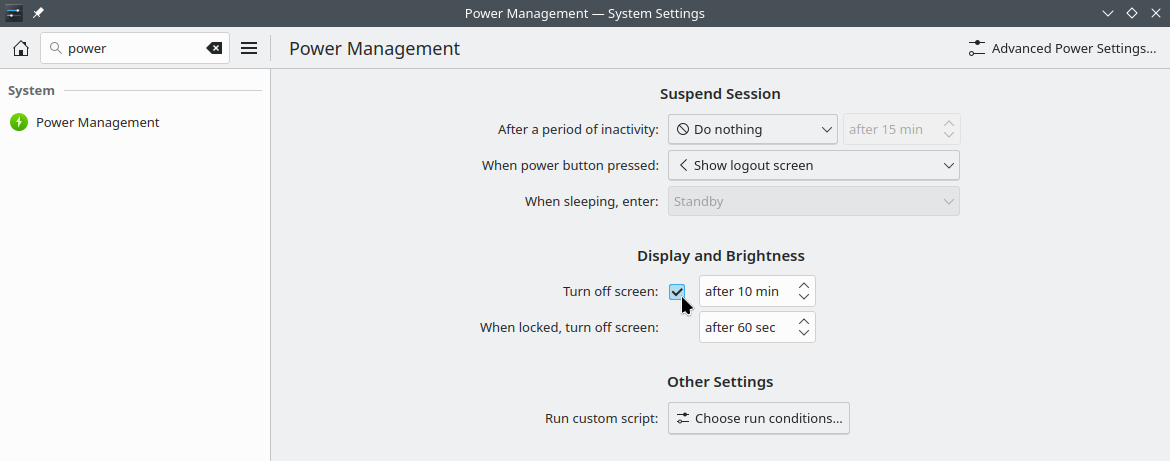
Finally, under “Power Management” uncheck “Turn off screen”.
Virt-Manager Tips
VM Desktop Shortcut
To quickly launch a VM from the App Launcher:
- Open
kmenuedit(Right click App Launcher Icon > Edit Application) - Under “Lost & Found” > Add New Item
- Name:
VM Krypton - Program:
/usr/bin/virt-manager - Command-Line Arguments:
--connect qemu:///system --show-domain-console OpensuseKrypton(note thatOpensuseKryptonmust be the exact name of the virtual machine in Virt-Manager) - Icon (empty button right of the “Name” text field):
openSUSE-distributor-logo
- Name:
- Save
VM Shared Directory
To quickly develop plasma 6 widget code in the host, then test in the VM.
- Virtual Machine > Details Tab
- Memory > Check Shared Memory
- Add Hardware > Filesystem
- Driver:
virtiofs - Source Path:
- Create a pool at
~/Code/plasmoid-tiledmenu - Then select
~/Code/plasmoid-tiledmenu/packagefor the Source Path
- Create a pool at
- Target Path:
plasmoid_tiledmenu(Note that this isn’t a filepath but an id that we use to mount in/etc/fstablater) - Finish
- Driver:
- Start the VM
- Open up the terminal (Konsole)
EDITOR=nano sudoedit /etc/fstab- Add the following line at the bottom.
plasmoid_tiledmenu /home/tester/.local/share/plasma/plasmoids/com.github.zren.tiledmenu virtiofs rw,noatime,_netdev 0 2 - https://wiki.archlinux.org/title/Fstab
- Note to use
TABto separate instead of spaces. rw,noatime,_netdevmeans Read/Write, ignore access times, and treat this as a Network Device.0 2is for<dump> <fsck>. I’m not entirely sure I should use2. I should probably use0to disable the checks.<dump>is checked by thedumputility. This field is usually set to0, which disables the check.<fsck>sets the order for file system checks at boot time; seefsck. For the root device it should be 1. For other partitions it should be2, or0to disable checking.
- Hit
Ctrl+XthenYthenEnterto save your changes in the Nano terminal text editor.
- Add the following line at the bottom.
- Create the
/home/tester/.local/share/plasma/plasmoids/com.github.zren.tiledmenu/folders if they do not currently exist. Make sure it’s an empty folder as well. - Restart the VM.
You should now have the package folder of your widget linked as an installed widget in your Plasma 6 VM which makes it easy to test.